
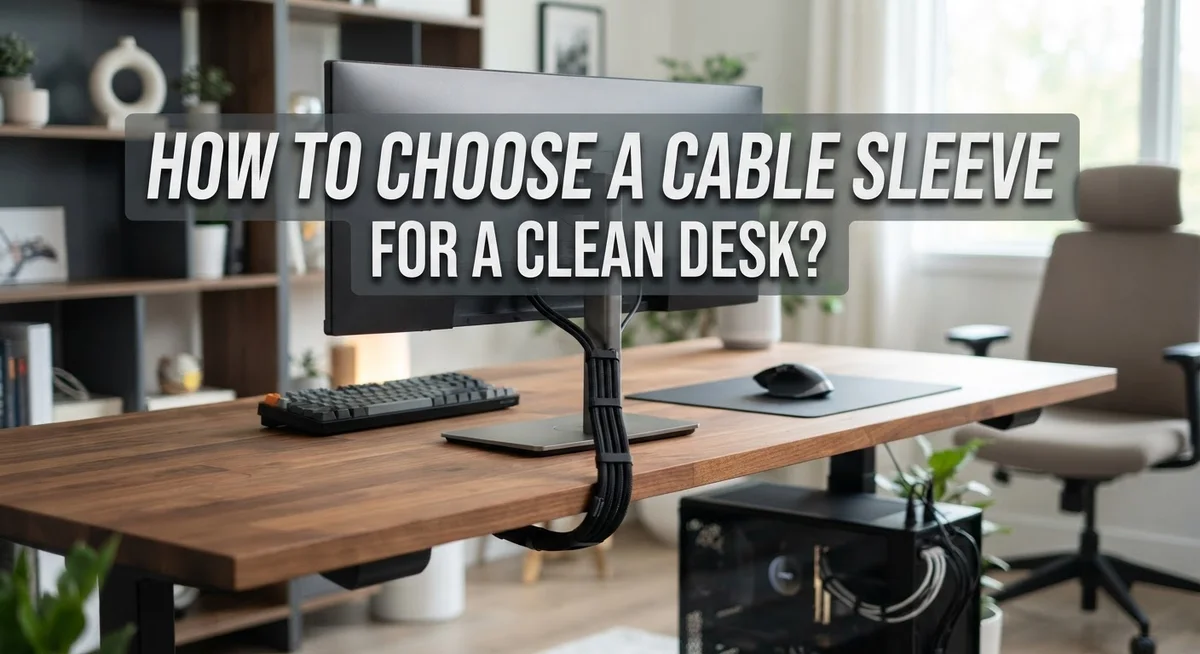
How to Choose a Cable Sleeve for a Clean Desk?
Does your desk look like a jungle of tangled wires? You are not alone. Messy cables make any workspace feel cluttered and stressful.
A cable sleeve is a simple fix for this problem. It bundles several cables into one neat column.
This guide will help you pick the right sleeve for your setup. You will learn what makes a sleeve work well and what to avoid.
We will cover the difference between sleeves and trays. Sleeves group cables that travel similar paths. Trays give rigid support underneath your desk.
You will also discover why split-loom or zipper-style sleeves often work best. They let you add or remove cables without starting over.
We will share tips on leaving enough slack in your cables. This small step prevents damage over time.
Finally, we will point out common mistakes people make. Things like overstuffing a sleeve or trapping heat from power adapters.
By the end, you will know exactly how to choose a sleeve that keeps your desk clean and functional. Let’s get started.
In a Nutshell
Here is a quick recap of what matters most when picking a cable sleeve.
-
Pick the right style. Split-loom or zipper-style sleeves give you easy access. You can add or remove cables without starting over.
-
Match capacity to your cables. Most sleeves hold 4 to 8 cables comfortably. Do not force more inside one sleeve.
-
Group similar cable paths. Sleeves work best when cables run the same direction. This keeps your bundle neat and flat.
-
Leave slack in every cable. Tight cables can bend or break over time. Always give your wires a little room to move.
-
Watch out for heat. Fabric sleeves trap warmth inside. Keep power adapters separate from your bundled cables.
-
Think modular. A good sleeve setup lets you update your desk later. This saves time when you add new devices.
Follow these simple points, and your desk will look clean fast. A little planning now means less tangled mess later.
What Is a Cable Sleeve and How Does It Work?
A cable sleeve is a fabric or plastic tube that groups multiple cables together into one neat bundle. Instead of having wires scattered all over your desk, a sleeve contains them in a single, organized column. Most sleeves can hold between 4 and 8 cables comfortably, depending on cable thickness.
The sleeve works by sliding over your cables as they run from one location to another. Think of it like a protective tunnel for your wires. As cables travel from your computer to power outlets or other devices, the sleeve keeps them aligned and prevents them from tangling or spreading across your desk surface.
Split-loom and zipper-style sleeves function differently than solid tubes. Split-loom sleeves have a lengthwise opening that lets you insert or remove cables without disconnecting everything. Zipper-style sleeves feature an actual zipper, making access even easier when you need to add, remove, or troubleshoot a cable.
The fabric or material of the sleeve matters too. Most sleeves use flexible nylon or polyester that bends with your cables. This flexibility is important because it allows cables to move naturally without kinking or breaking. The material also protects wires from dust and minor damage.
Heat management is a key function people often overlook. Fabric sleeves do trap some warmth inside, so avoid bundling multiple power adapters together in one sleeve. Heat buildup can damage cables over time.
Finally, sleeves work best when cables travel the same direction. If some cables need to branch off in different ways, a sleeve may not be the right choice. A modular approach using multiple smaller sleeves often works better than forcing all cables into one large bundle.
Types of Cable Sleeves: Split-Loom, Zipper, and Braided Options
Cable sleeves come in three main styles, each with its own strengths. Understanding these options helps you pick the right one for your desk setup.
Split-loom sleeves feature a slit running along the length. You can open this slit and feed cables inside without disconnecting them. This design makes adding or removing cables simple. Split-loom works well if you plan to adjust your setup later. The material is usually plastic or rubber, which resists heat better than fabric.
Zipper sleeves use a zipper mechanism instead of a slit. You unzip the sleeve, insert your cables, and zip it closed. This style looks cleaner than split-loom because the zipper stays hidden. Zipper sleeves often use fabric material, which feels softer and looks more professional on a desk. The downside is that zippers can jam or wear out over time.
Braided sleeves wrap around your cables in a woven pattern. They do not open or split, so you must route all cables through before installation. Braided sleeves offer the most polished appearance and work best for permanent cable runs. They provide excellent protection and airflow, reducing heat buildup. However, they require disconnecting cables to make changes.
Each style handles 4 to 8 cables comfortably. Split-loom offers the most flexibility for frequent updates. Zipper sleeves balance appearance with accessibility. Braided options deliver a premium look for final installations.
Your choice depends on three factors: how often you change cables, how important aesthetics are to you, and whether heat management matters in your space. Most people find split-loom or zipper styles strike the best balance between function and form.
Assessing Your Desk Setup and Cable Count
Before you pick a cable sleeve, take time to understand your desk setup. Start by counting exactly how many cables you have running behind or under your desk. Look for power cords, USB cables, HDMI lines, ethernet connections, and any other wires you use regularly.
Next, trace the path each cable takes. Do they all run in the same direction toward a power strip? Do some cables branch off to different areas? Understanding cable flow is crucial because sleeves work best when cables travel together along similar routes.
Check which cables generate heat during use. Power adapters and charging cables produce warmth, so you should not bundle too many heat sources inside one sleeve. Separate hot cables from data cables whenever possible to prevent damage and reduce fire risk.
Measure the distance your cables need to travel. Some cables might only run 12 inches across your desk, while others travel several feet. Different sections may need different sleeve sizes. A modular approach lets you use one sleeve for a short run and another for a longer distance.
Look at how often you swap cables. If you frequently add or remove devices, split-loom or zipper sleeves offer better access than solid tubes. If your setup stays stable, you have more flexibility in your choice.
Finally, consider your desk layout and aesthetic preferences. Does your workspace have a cable tray underneath? Are cables visible from the front? These details influence which sleeve style works best for your situation.
Taking time now to assess your setup prevents frustration later and helps you select the right sleeve the first time.
Step-by-Step: Preparing and Bundling Your Cables
Start by gathering all the cables on your desk. Pull them out from behind monitors, under your desk, and anywhere else they hide. Count how many cables you have and note which ones run in the same direction.
Next, disconnect your cables carefully. Take photos of your setup before you unplug anything. This helps you reconnect everything correctly later. Gently untangle each cable and lay them flat on your work surface.
Now organize your cables by destination. Group cables that travel to the same location, like your monitor, printer, or power strip. This step makes bundling much easier and more effective.
Inspect each cable for damage before bundling. Look for cuts, frayed sections, or exposed wires. Set aside any damaged cables and replace them before proceeding.
Use cable trays to support your cables along their path. Trays prevent cables from hanging loosely and getting tangled again. Position trays at key points where cables change direction.
Leave plenty of slack in your cable bundle. Don’t pull cables tight when grouping them together. Tight cables can crack or break inside their insulation over time. Aim for gentle curves rather than sharp bends.
Apply Velcro ties to hold cables loosely together. These ties work better than permanent solutions because you can adjust them later if needed. Space your ties about 12 inches apart along the cable run.
Finally, test everything before closing up your desk. Plug cables back in and verify all devices work properly. Make sure nothing feels hot to the touch near your bundle. This final check catches problems before they become bigger issues.
Combining Sleeves with Trays and Clips for Full Coverage
Cable sleeves work best when you combine them with other cable management tools. This layered approach gives you complete control over your desk’s appearance and function.
Cable trays form the foundation of your setup. They hold cables horizontally and prevent them from tangling under your desk. Trays support the weight of multiple cables, which reduces strain on your connectors. Place your tray along the path where cables naturally run.
Once your cables sit in a tray, use the sleeve to bundle them together. The sleeve compresses the cables into one clean column. This creates a finished look that catches the eye immediately. Your desk suddenly feels organized and professional.
Clips serve as the final piece of this system. They anchor your bundled cables to the desk edge, wall, or monitor arm. Clips prevent cables from drooping or shifting position. Space your clips every 12 to 18 inches along the cable run for best results.
Here’s how these three tools work together: The tray supports your cables horizontally. The sleeve groups them into a single bundle. The clips hold everything in place. This combination eliminates movement and keeps cables exactly where you want them.
Start by installing your tray first. Next, gather your cables and slide them into the sleeve. Finally, attach clips at regular intervals. This sequence ensures nothing shifts during the process.
The modular benefit matters here. You can remove clips easily if you need to swap cables. The sleeve slides off without tools. The tray remains in place for future use. This flexibility means your cable management system adapts as your needs change, without requiring a complete rebuild.
Tips for a Flexible, Future-Proof Cable Setup
A flexible cable setup means your desk adapts as your needs change. Technology evolves, and your workspace should too.
Start by choosing a sleeve type that allows easy access. Split-loom or zipper-style sleeves let you add or remove cables without completely redoing your entire bundle. This flexibility saves you time when you upgrade devices or swap equipment.
Leave extra cable slack throughout your setup. Tight cables create stress points that damage insulation over time. Slack also means you can reposition devices without pulling your whole system apart. Think of it like giving your cables room to breathe.
Use Velcro ties instead of permanent fasteners. Velcro adjusts easily when you need to change things. Zip ties work for permanent installations, but they make future changes difficult. Velcro lets you maintain your setup without starting from scratch.
Plan your cable paths with growth in mind. If you might add a monitor or external drive later, route your sleeve through spaces that can accommodate extra cables. Don’t pack every cable tightly into one sleeve from day one.
Keep your cable tray and clips accessible. When you need to make changes, you shouldn’t have to disassemble half your desk. A modular approach means each component works independently.
Label your cables with small tags or markers. Future you will appreciate knowing which cable goes where. This simple step prevents confusion when you make updates.
Review your setup every few months. As your desk evolves, your cable management should too. Small adjustments prevent bigger problems later.
Common Mistakes to Avoid When Sleeving Cables
Heat entrapment stands as one of the most common mistakes people make when sleeving cables. Fabric sleeves naturally trap warm air around your cables, which creates a serious problem when you bundle multiple power adapters together inside one sleeve.
Power adapters generate significant heat during normal use. When you wrap several of them in a single sleeve, that heat has nowhere to escape. Over time, this trapped heat can damage your cables, shorten adapter lifespan, and create a potential fire hazard.
The solution is simple: avoid bundling power adapters together in one sleeve. Keep heat generating devices separate or use a breathable sleeve type that allows airflow. Space out your adapters along your cable path instead.
Over tightening represents another frequent mistake. People cinch their Velcro ties too tight, thinking tighter means better organization. This actually stresses your cables and can damage the internal wiring over time.
Leave room for cables to breathe inside the sleeve. Your bundle should feel snug but not compressed. You should easily slide your finger between the cables and the sleeve material.
Insufficient slack causes additional problems. When you pull cables too tight from device to device, you create tension that wears on connectors and internal components. Always leave extra cable length coiled behind your desk or in your cable tray.
Overstuffing your sleeve with too many cables makes the bundle bulky and difficult to manage. Stick to the recommended capacity of 4 to 8 cables per sleeve. More cables than this creates a tangled mess that defeats the purpose of sleeving.
Finally, neglecting regular cable maintenance leads to hidden damage. Check your cables monthly for signs of wear, fraying, or heat damage. Early detection prevents costly equipment failures and safety issues.
Maintaining Your Cable Sleeve System Over Time
Your cable sleeve system needs regular attention to stay organized and function properly. Think of it like maintaining any other part of your desk setup.
Check your cables monthly to catch problems early. Look for fraying, cracks, or damage to the sleeve material itself. A damaged sleeve won’t protect your cables effectively, and worn fabric can snag wires inside.
Keep your cable paths clear of dust and debris. Dust buildup reduces airflow and can trap heat around your cables. Use a soft brush or compressed air to gently clean around your sleeves and the cables running through them. This takes just a few minutes but extends the life of your system significantly.
Adjust your Velcro ties regularly. Over time, these ties can loosen or become less sticky. Re-secure them when you notice cables shifting inside the sleeve. This prevents cables from moving around and creating tangles.
Test your connections every few months. Wiggle cables gently at both ends to ensure they stay firmly connected. Loose connections can cause equipment to malfunction or stop working entirely.
Review your entire setup twice yearly. Your needs change, and your cable system should adapt with you. You might add new devices, remove old ones, or discover better cable paths. A quick review helps you stay ahead of problems.
Replace sleeves that show significant wear. A sleeve with holes, cracks, or permanent deformation won’t organize your cables effectively anymore. Replacing it is cheaper than dealing with tangled cables or damaged equipment later.
Keep your labels updated. If you’ve labeled your cables, refresh those labels when they fade or become hard to read. Clear labeling saves time during maintenance and troubleshooting.
Final Thoughts
Choosing the right cable sleeve comes down to understanding your setup. Split loom and zipper style sleeves work best for most desks because they let you add or remove cables easily. A sleeve that bundles four to eight cables gives you the cleanest look without straining the fabric.
Think about how your cables travel before you buy a sleeve. Cables that follow the same path benefit most from sleeving. This keeps your desk looking tidy and your cables protected from tangling.
Remember the golden rule: sleeves group cables together, while trays give them structure. Using both tools creates a system that looks clean and stays functional over time.
Avoid the common traps that ruin a good setup. Bundling power adapters in one sleeve traps heat and damages your gear. Pulling ties too tight stresses your cables and shortens their life.
A clean desk is not a one time project. Your needs will change as you add new devices or rearrange your workspace. This is why a flexible system matters more than a perfect one.
Small habits keep your setup working well. Check your cables every few months. Adjust ties as needed. Replace worn sleeves before they cause problems.
Simple choices lead to lasting results. Pick a sleeve type that matches your cable count. Leave enough slack for movement. Keep your system easy to update.
A well organized desk saves you time and reduces stress. You spend less time untangling cords and more time focusing on your work. With the right sleeve and a bit of maintenance, your desk stays clean for years to come.
Frequently Asked Questions
What is the difference between a cable sleeve and a cable tray?
Cable sleeves bundle multiple cables together into one organized column. They work best when your cables travel along the same path. Trays, on the other hand, provide rigid support and structure for cables. Trays hold cables in place without bundling them tightly together.
Choose a sleeve when you want cables grouped neatly. Choose a tray when you need cables to stay separated but organized. Many people use both together for the best results.
How many cables can fit inside one sleeve?
Most cable sleeves hold between 4 and 8 cables comfortably. The exact number depends on cable thickness and sleeve diameter. Thicker cables like power cords take up more space than thin data cables.
Do not overstuff your sleeve. A bulky bundle becomes hard to manage and looks messy. Leave room for cables to move slightly inside the sleeve.
Should I use a split or zipper style sleeve?
Split loom and zipper style sleeves offer better accessibility than solid options. You can open them easily to add or remove cables without untangling everything. This flexibility makes updates simple and fast.
Solid sleeves look cleaner but require more effort to modify. Split designs cost slightly more but save time during maintenance.
What mistakes should I avoid when using cable sleeves?
Never bundle multiple power adapters in one sleeve. Heat from adapters can build up inside fabric sleeves and cause damage. Spread power adapters across different sleeves or leave them loose.
Avoid over tightening cables or ties. Your bundle should feel snug but not compressed. Always leave extra slack so cables can breathe and move freely.

DK is a tech enthusiast and product reviewer dedicated to helping readers explore the ever-evolving world of technology. With a passion for testing gadgets, apps, and appliances, DK delivers honest, in-depth reviews and practical buying guides to make your tech decisions easier.


