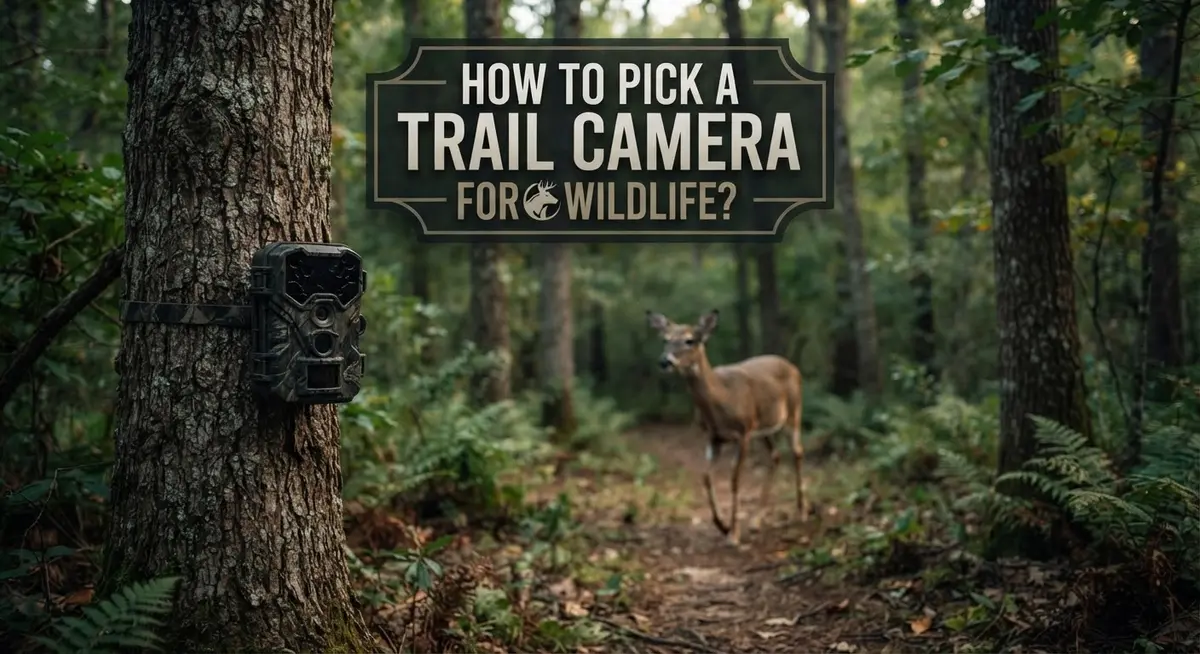
How to Pick a Trail Camera for Wildlife?
Picking the right trail camera can feel tricky. You want clear photos, fast triggers, and long battery life. But too many choices make it hard to know where to start.
A good trail camera helps you capture wildlife without disturbing them. It works day and night. It waits patiently until an animal walks by.
This guide breaks down everything you need to know. We cover the key specifications that matter most, like lens type and trigger speed. You will learn about features such as Low Glow and Hyper Burst.
We also share simple setup steps. You will discover the best height and angle for your camera. Good placement makes a huge difference in the shots you get.
Mistakes happen often with trail cameras. We point out common errors, like poor stability or false triggers from wind. Avoiding these issues saves you time and frustration.
By the end, you will feel confident choosing a camera that fits your needs. You will know how to set it up correctly too. Let’s get started on finding your perfect wildlife companion.
In a Nutshell
Here’s a quick summary to keep in mind:
-
Focus on core priorities like high resolution, fast trigger speed, and long battery life. These three factors matter most for clear wildlife shots.
-
Check key specs such as fixed focal length lenses and features like Low Glow or No Glow. These help you get sharp images without spooking animals.
-
Place your camera correctly. Position it 3 to 4 meters from the target area at chest height for the best results.
-
Angle it right. Set your camera at a 45 degree angle to the trail. This simple trick captures more shots as animals pass by.
-
Avoid common mistakes. Poor placement, weak mounts, and wrong height often ruin good footage. Stability is just as important as camera quality.
-
Prevent false triggers. Wind and debris can set off your camera by mistake. Clear the area around your setup to avoid this issue.
Keep these points handy. They will help you make a smart choice and set up your camera the right way from day one.
Understanding Trail Cameras and How They Work
A trail camera is a motion activated device that captures photos or videos of wildlife automatically. It sits in the field and takes pictures whenever movement triggers its sensor. This lets you observe animals without being present to disturb them.
How the camera works is straightforward. The device contains an infrared sensor that detects heat and motion. When an animal passes in front of the lens, the sensor activates the shutter. The camera then records the image to a memory card inside.
Most trail cameras use a fixed focal length lens. This means the lens does not zoom in or out. The focus stays set at a specific distance, usually several meters away. This design keeps the camera simple and reliable in outdoor conditions.
Key features vary between models. Low Glow or No Glow technology reduces visible light when the camera takes photos at night. This prevents animals from noticing the flash. Hyper Burst mode captures multiple shots in quick succession. ARD stands for Active Infrared Detection, which helps the camera sense movement more accurately. Freeze Frame Shutter technology captures sharp images even when animals move quickly.
Battery life matters greatly for field use. A camera with poor battery performance requires frequent trips to replace batteries. You want a device that runs for weeks or months on a single set.
Trigger speed is the time between motion detection and photo capture. Fast trigger speeds catch more action. Slow trigger speeds miss quick moving animals.
Image resolution determines photo clarity. Higher resolution captures fine details like fur texture and facial features. Lower resolution produces blurry or unclear images that are hard to identify.
Understanding these basics helps you make smart choices. You will know what specifications matter most for your specific wildlife monitoring needs. This knowledge prevents wasting money on features you do not need.
Key Specifications to Evaluate Before Choosing a Camera
When evaluating trail cameras, you need to focus on several critical specifications that directly impact your wildlife monitoring success.
Image resolution is your first consideration. Higher megapixel counts produce clearer photos that let you identify animals and details from a distance. Look for cameras offering at least 12 to 20 megapixels for quality wildlife documentation.
Trigger speed measures how quickly the camera captures an image after detecting motion. Faster trigger speeds (under 0.5 seconds) catch more action and reduce missed shots. This matters especially when photographing quick moving animals like deer or smaller mammals.
Battery life determines how long your camera stays active in the field. Consider cameras that run for several months on standard batteries. Longer battery life means fewer trips to replace batteries and more consistent monitoring.
Lens specifications deserve careful attention. A fixed focal length lens works best because it maintains consistent focus across your target area. This prevents blurry images and ensures reliable wildlife capture.
Special features add practical value to your setup. Low Glow or No Glow infrared technology prevents visible flashes that spook animals. Hyper Burst mode captures multiple photos in rapid succession, increasing your chances of getting the perfect shot. ARD (Active Illumination Reduction) and Freeze Frame Shutter minimize motion blur in night photos.
Detection range tells you how far the camera senses movement. Wider detection ranges capture more activity but may trigger on distant movement. Narrower ranges focus on your specific target zone.
Video capabilities let you choose between still photos, video clips, or both. Video provides behavior context that photos alone cannot show.
Weather resistance protects your investment from rain, snow, and temperature extremes. Look for cameras rated for outdoor conditions in your climate.
Before purchasing, write down which specifications matter most for your specific monitoring goals. This focused approach saves time and ensures you select a camera that actually performs the way you need it to.
Defining Your Wildlife Monitoring Priorities
Before you start shopping for a trail camera, take time to figure out what you actually need. This step saves money and prevents buyer’s remorse.
Start by asking yourself basic questions. What animals are you trying to monitor? Are you tracking deer, bears, birds, or small rodents? Different species need different camera setups. A camera designed for large animals may miss small creatures entirely.
Next, consider your specific goals. Are you monitoring wildlife for research, property security, or simple observation? Your purpose shapes every decision. Research projects need high image quality and accurate timestamps. Security monitoring might prioritize fast trigger speeds and night vision clarity.
Think about your location and climate. Will your camera sit in wet conditions, extreme heat, or freezing temperatures? Some environments demand weatherproof models with stronger battery performance. A camera for tropical regions needs different protection than one for snowy areas.
Decide what type of data matters most to you. Do you need still photos, video clips, or both? High resolution images take up more storage space but show fine details like animal markings. Video captures behavior and movement patterns better than photos alone.
Evaluate your budget for the entire project. Camera cost is just one expense. You’ll also need mounting hardware, memory cards, batteries, and potentially solar panels for extended field use. Understanding your total spending helps you prioritize features that matter most.
Identify how often you’ll check your camera. Frequent visits allow you to manage batteries and storage differently than cameras you check once monthly. Remote monitoring capability becomes important if you can’t visit often.
Writing down these priorities creates a clear checklist. You’ll know exactly which features are essential and which are nice to have. This focused approach makes comparing different camera models much easier and more practical.
Step-by-Step Guide to Positioning and Mounting Your Camera
Before you mount your camera, scout the location carefully. Walk the trail or area where animals pass through. Look for tracks, droppings, and worn paths. These signs show you exactly where wildlife moves most frequently.
Position your camera 3 to 4 meters away from the target trail or area. This distance lets you capture the animal’s full body and movement. Placing it too close creates blurry images. Placing it too far misses important details.
Mount the camera at chest height for most wildlife. This angle works well for deer, raccoons, and similar sized animals. For ground dwelling creatures like armadillos or badgers, lower the camera closer to the ground. For birds and tree climbing animals, aim higher.
Angle your camera 45 degrees to the trail instead of pointing straight ahead. This angle captures more passing animals and creates better photo opportunities. A perpendicular shot often misses animals walking parallel to your lens.
Use a sturdy mount rather than straps when possible. Straps loosen over time from wind and vibration. Mounts keep your camera stable and consistent. Stability prevents false triggers from camera movement.
Angle the camera slightly downward toward the ground. This positioning captures animals at their natural height and reduces sky glare in your images.
Clean the lens before mounting. Dust, spider webs, and debris block the sensor and trigger false alarms. Wipe the lens gently with a soft cloth.
Check your camera’s angle by taking test photos from the mounted position. Walk through the area yourself to see what the camera actually captures. Adjust if needed before leaving the site.
Make sure the camera faces open areas, not dense brush or trees. Clear sightlines reduce false triggers from wind moving vegetation. Your camera should have a clear view of where animals will appear.
Optimizing Camera Settings for Different Wildlife
Your trail camera’s settings make the difference between capturing useful wildlife data and wasting battery on false triggers. Different animals require different approaches, so adjust your configuration based on what you’re monitoring.
Sensitivity levels control how easily your camera detects motion. Large animals like deer and bears need lower sensitivity settings. Birds and small mammals demand higher sensitivity to catch their quick movements. Start with medium sensitivity and test it during your first few days of monitoring.
Detection range should match your terrain. Open grasslands benefit from maximum range settings. Dense forests need shorter ranges to reduce false triggers from wind moving branches. Adjust this setting based on what’s actually in your camera’s view.
Image quality settings depend on your storage space and internet connection. High resolution images use more memory but show fine details. Lower resolutions save space if you’re checking cameras infrequently. Consider how often you can visit your camera location.
Trigger delay is the pause between consecutive photos. Fast delays capture multiple shots of the same animal, giving you better identification options. Slower delays preserve battery life and storage space. For nocturnal animals, set faster delays since fewer triggers occur at night.
Flash modes need careful consideration. No glow infrared works best for shy wildlife that reacts to visible light. Standard flash provides clearer nighttime images but may scare animals. Low glow infrared offers a middle ground.
Video length affects battery consumption significantly. Shorter clips save power but may miss important behavior. Longer clips drain batteries faster. Test different lengths to find your balance.
Time stamp settings help you track activity patterns. Enable date and time stamps to identify when animals visit. This data reveals whether your target species is active during day or night.
Adjust settings gradually and monitor results. Wildlife behavior varies by season, so revisit your configuration every few months. What works in summer may need changes when fall arrives.
Common Mistakes That Reduce Image Quality and Capture Rate
Poor placement ranks as the biggest reason trail cameras fail to capture quality images. Many people mount cameras too close or too far from the target area. When you place your camera closer than 3 meters, fast moving animals blur before the sensor reacts. Placing it beyond 4 meters means distant subjects appear too small in the frame.
Incorrect angles waste countless photos. Pointing your camera straight down the trail captures animals head on, which shows less detail and triggers fewer shots as they approach. Angling at 45 degrees to the trail keeps subjects in the frame longer and increases your capture rate significantly.
Height mistakes cost you valuable footage. Mounting at eye level works for deer, but ground nesting birds or small mammals need lower angles. Animals moving below your lens line simply disappear from view.
Unstable mounting causes blurry, unusable images. Wind moves loose cameras enough to ruin sharpness. Straps allow subtle movement that degrades photo quality over time. Solid mounts eliminate this problem entirely.
False triggers drain your battery fast. Swaying branches, wind blown debris, and temperature changes trigger motion sensors constantly. Position cameras to avoid direct sunlight hitting the lens. Keep vegetation from moving in front of the sensor. These simple adjustments reduce wasted shots by 50 percent or more.
Dirty lenses create hazy, unclear images. Dust, pollen, and spider webs accumulate quickly in outdoor environments. Clean your lens before mounting and check it monthly during operation.
Low light positioning matters too. Cameras perform poorly when backlit by bright skies. Position your camera so the sun stays behind it, not in front of it.
These common mistakes are entirely preventable. Taking time to scout your location, mount properly, and maintain your equipment transforms your results dramatically.
Troubleshooting False Triggers and Missed Shots
False triggers waste your battery and fill your storage with useless photos. Wind blown debris, swaying branches, and temperature fluctuations cause most of these unnecessary shots. Understanding what triggers your camera helps you reduce wasted frames and capture real wildlife activity instead.
Adjust your sensitivity settings to match your specific environment. High sensitivity in windy areas causes constant false activations from moving vegetation. Lower your sensitivity in open spaces where wind is minimal. Test different levels and review results to find the sweet spot for your location.
Temperature changes create false triggers in certain camera models. Warm air rising from the ground or sudden temperature drops can activate motion sensors. Position your camera away from direct sunlight and heat sources. Shade from trees or structures helps stabilize temperatures around your lens.
Clean your lens regularly because dust and debris trigger false activations. Dirty lenses reflect light differently, confusing motion detection systems. Wipe your lens with a soft cloth before each monitoring session. Check for spider webs, pollen, or condensation that might block the sensor.
Adjust your camera angle to reduce false triggers from irrelevant motion. Point your camera at the specific trail or area where you expect wildlife. Avoid aiming at areas with constant movement like tall grass or tree branches. A 45 degree angle to the trail captures more animals while reducing background motion detection.
Use your camera’s freeze frame shutter feature if available. This setting reduces blur and false triggers by stabilizing image capture. ARD (Active Infrared Deterrent) technology also minimizes false activations in some models by filtering out non animal motion.
Check your trigger delay settings. Longer delays between shots reduce false trigger sequences. This prevents your camera from taking multiple photos during a single wind gust or temperature spike.
Final Thoughts
Picking the right trail camera for wildlife comes down to matching features with your specific goals. Resolution, trigger speed, and battery life remain your top priorities.
Think about what animals you want to capture. A camera set up for deer differs from one aimed at ground nesting birds or small mammals.
Placement matters just as much as the camera itself. Position your camera three to four meters from the target area. Set it at chest height for most wildlife.
Angling your camera at 45 degrees to the trail gives you better coverage. This simple adjustment captures more movement than a straight-on angle.
Stability prevents blurry images. Always use a solid mount instead of straps that shift in wind or weather.
Clean lenses produce clear photos every time. Make lens cleaning part of your regular maintenance routine.
Low glow and no glow flash options help you photograph nocturnal animals without startling them. Hyper burst and freeze frame shutter features capture fast moving subjects with sharp detail.
Before you buy, write down your specific needs. Are you tracking predators, monitoring herds, or studying bird activity?
Your answer shapes which features actually matter for your situation.
Avoid the common mistakes that hurt image quality. Poor placement, wrong angles, and unstable mounting all reduce your success rate.
False triggers from wind and debris waste battery life fast. Choose a camera with adjustable sensitivity to fix this problem.
Height positioning depends entirely on your target species. Research their typical movement patterns before setting up your camera.
A well chosen trail camera becomes a reliable tool for wildlife observation. It helps you understand animal behavior without disturbing their natural habits.
Take time to test different settings once your camera is in place. Small adjustments often lead to noticeably better results over time.
With the right camera and setup, you will capture clear, useful images that tell you exactly what is happening in your monitored area.
Frequently Asked Questions
What resolution do I actually need for wildlife photos?
Higher resolution captures more detail. You want at least 12 megapixels for clear, usable images. If you plan to crop or zoom into your photos later, 20 megapixels or more gives you flexibility. The real key is matching resolution to your needs. A basic wildlife survey needs less than detailed documentation for research purposes.
How fast should the trigger speed be?
Trigger speed measures how quickly your camera captures an image after detecting motion. Fast trigger speeds under 0.5 seconds catch fleeting moments. Most wildlife moves quickly, so anything slower than 1 second risks missing your subject entirely. Test your camera’s speed in your specific environment before relying on it for important footage.
Does battery life really matter that much?
Yes. A camera that dies after two weeks leaves you with incomplete data. Look for cameras lasting at least 6 to 8 months on a fresh battery set. Battery drain depends on your environment, flash usage, and how often motion triggers recordings. Cold weather drains batteries faster, so plan accordingly for winter monitoring.
Should I choose infrared or white flash?
Infrared (no glow) flash doesn’t startle nocturnal animals, making it ideal for shy species. White flash produces brighter, more detailed nighttime images but may scare wildlife away. Your choice depends on your goals. If you want natural behavior documentation, infrared works better. For maximum image clarity, white flash delivers superior results.
What’s the best way to prevent battery drain?
Adjust your sensitivity settings to reduce false triggers. Clean your lens regularly to prevent motion detection from dust particles. Use your camera’s freeze frame shutter feature to stop unnecessary video recording. Position your camera away from swaying branches and wind blown debris that cause phantom triggers.

DK is a tech enthusiast and product reviewer dedicated to helping readers explore the ever-evolving world of technology. With a passion for testing gadgets, apps, and appliances, DK delivers honest, in-depth reviews and practical buying guides to make your tech decisions easier.